超级马里奥游戏开发一游戏基本界面

目录

超级马里奥游戏开发一(游戏基本界面)
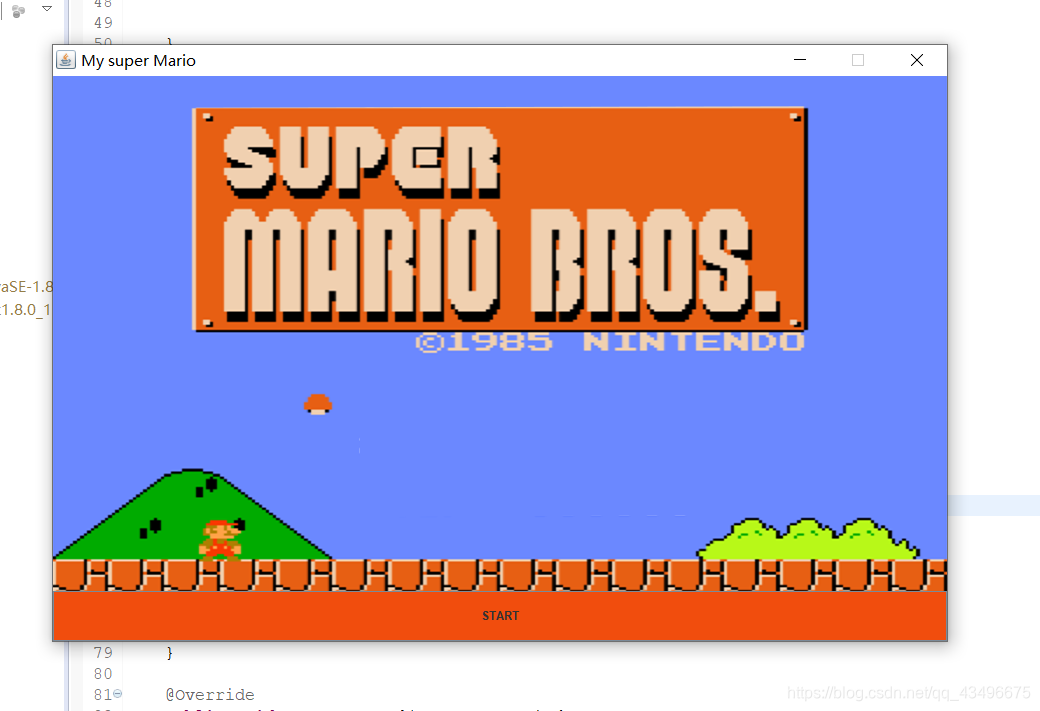
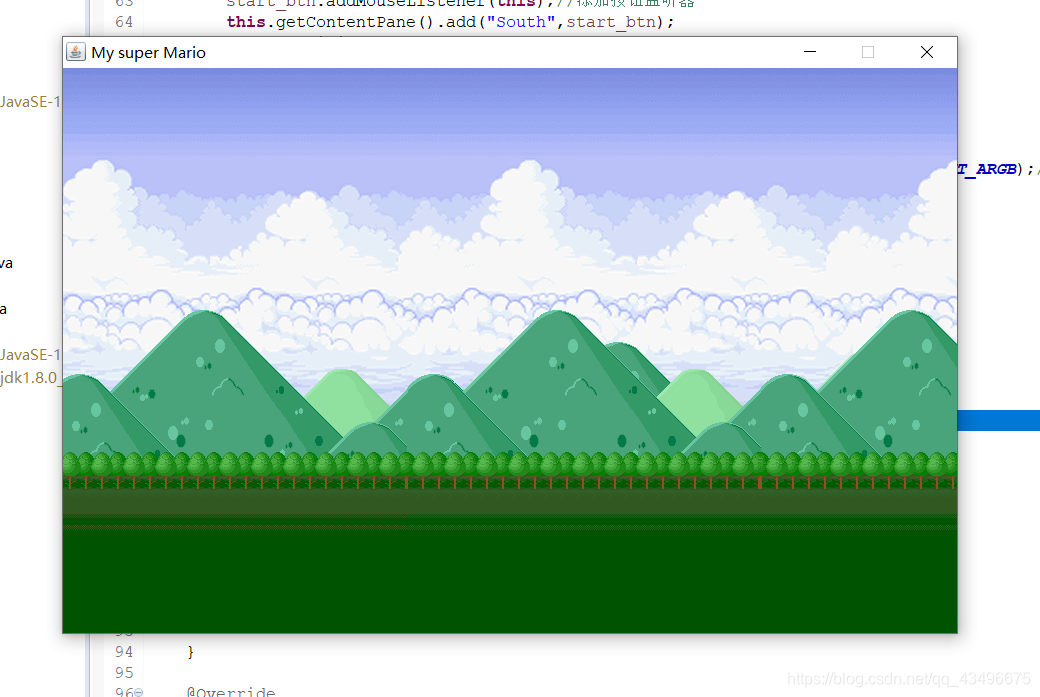
实现功能:开始界面,点击开始游戏进入游戏界面
(1)常量类StaticValue
第一步我们的游戏肯定有很多的常量素材,比如一些背景图片,音乐,马里奥的形象,建筑,敌人等等。为了便于我们的使用,我们可以写一个常量类来保存这些预先处理好的材料。
- 我们需要:①游戏开始图片 ②游戏进行时图片 ③游戏结束时图片 ④马里奥的图片 ⑤怪物的图片 ⑥障碍物的图片
- 这些都是不需要改变的常量,因此定义为static属性
- 我们将图片资源存储在工程的image目录下,因此可以用一个字符串imgPath来保存路径,方便读取图片
- 在游戏开始前我们需要准备个好所有的素材,因此这个类还需要一个方法初始化这些属性

public class StaticValue {


	public static String imgPath = System.getProperty("user.dir")+"/image/";

	public static BufferedImage startImg = null;//开始图片
	public static BufferedImage endImg = null;//结束图片
	public static BufferedImage bgImg1 = null;//背景图片1
	public static BufferedImage bgImg2 = null;//背景图片2
	public static List<BufferedImage> marioImgs = new ArrayList<BufferedImage> ();//马里奥
	public static List<BufferedImage> flowerImgs = new ArrayList<BufferedImage> ();//食人花
	public static List<BufferedImage> mushroomImgs = new ArrayList<BufferedImage> ();//蘑菇怪
	public static List<BufferedImage> turtleImgs = new ArrayList<BufferedImage> ();//乌龟怪
	public static List<BufferedImage> constructionsImgs = new ArrayList<BufferedImage> ();//障碍物

	public static void init(){
		try {
			startImg = ImageIO.read(new File(imgPath+"bg/start.PNG"));
			endImg = ImageIO.read(new File(imgPath+"bg/background.PNG"));
			bgImg1 = ImageIO.read(new File(imgPath+"bg/firststage.gif"));
			bgImg2 = ImageIO.read(new File(imgPath+"bg/firststageend.gif"));

			for(int i=1;i<=11;i++){
				BufferedImage img =  ImageIO.read(new File(imgPath+"mario/"+i+".PNG"));
				marioImgs.add(img);
			}

			for(int i=0;i<4;i++){
				BufferedImage img =  ImageIO.read(new File(imgPath+"mushroom/en1_"+i+".PNG"));
				mushroomImgs.add(img);
			}

			for(int i=1;i<=2;i++){
				BufferedImage img =  ImageIO.read(new File(imgPath+"flower/flower"+i+".gif"));
				turtleImgs.add(img);
			}

			for(int i=0;i<4;i++){
				BufferedImage img =  ImageIO.read(new File(imgPath+"turtle/en0_"+i+".PNG"));
				flowerImgs.add(img);
			}

			for(int i=1;i<=12;i++){
				BufferedImage img =  ImageIO.read(new File(imgPath+"construction/ob"+i+".PNG"));
				constructionsImgs.add(img);
			}


		} catch (IOException e) {
			// TODO Auto-generated catch block
			e.printStackTrace();
		}


	}
}
(1)MyFrame类(继承JFrame利用双缓冲绘图)
①显示一个游戏窗口,背景图片是游戏开始图片,有一个开始的按钮。
- 使用边界布局BorderLayout
- 容器划分为东、西、南、北、中五个区域,每个区域只能放置一个组件。
public class MFrame extends JFrame {

	private Graphics g;
	// 创建双缓冲画布
	private BufferedImage buffimg;
	// 取到缓冲画笔  画笔画的内容就先画在这张图片上buffimg
	private Graphics buffg;

	public static void main(String[]args){
		MFrame mf = new MFrame();
		mf.startGame();//开始游戏
	}

	public MFrame(){
		this.setTitle("My super Mario");//标题
		this.setSize(900,600);//窗口大小
		this.setLocationRelativeTo(null);//窗口位置:正中间
		this.setResizable(false);//窗口大小不可变
		this.setDefaultCloseOperation(JFrame.EXIT_ON_CLOSE);//点击右上角X后结束程序
		this.setVisible(true);//窗体可见
		StaticValue.init();//初始化常量类
		g = this.getGraphics();//得到画布
		buffimg = new BufferedImage(getWidth(), getHeight(),BufferedImage.TYPE_INT_ARGB);//缓冲图片
		buffg = buffimg.getGraphics();//缓冲图片的画笔

	}


	public void startGame(){
		//显示游戏进入界面背景图片
		Image bgimg = new ImageIcon(StaticValue.startImg).getImage();
		buffg.fillRect(0, 0, this.getWidth(), this.getHeight());
		buffg.drawImage(bgimg,0,0,null,null);
		g.drawImage(buffimg, 0, 0, null, null);
		//游戏开始按钮
		this.setLayout(new BorderLayout(500,500));
		JButton start_btn = new JButton();
		start_btn.setText("START");
		start_btn.setPreferredSize(new Dimension(100,50));
		start_btn.setBackground(new Color(241,77,13));
		start_btn.setBorderPainted(true);
		start_btn.addMouseListener(this);//添加按钮监听器
		this.getContentPane().add("South",start_btn);
		this.setVisible(true);

	}
}
②为按钮添加监听器,在这里用MFrame实现MouseListner接口,重写按钮按下的方法
public class MFrame extends JFrame implements MouseListener{/*
*重写按钮点击的方法
*/
@Override
public void mouseClicked(MouseEvent e) {
// TODO Auto-generated method stub
inGame();//按钮按下进入游戏界面
}/*
*处于游戏中的方法
*/
public void inGame(){
this.getContentPane().removeAll();//清除原来的组件
buffimg = new BufferedImage(getWidth(), getHeight(),BufferedImage.TYPE_INT_ARGB);//缓冲图片
buffg = buffimg.getGraphics();//缓冲图片的画笔
buffg.fillRect(0, 0, this.getWidth(), this.getHeight());
Image bgimg = new ImageIcon(StaticValue.bgImg1).getImage();
buffg.drawImage(bgimg, 0, 0, null, null);
g.drawImage(buffimg, 0, 0, null, null);
}按钮点击后的效果:

